

Where Should The Name Of The Track Never Be Changed?
Mixing a track achieves three goals. It makes the limerick audio amend organised and more polished. Information technology puts a cease to all that tinkering with individual tracks and sounds. And it makes a stereo mix ready for mastering. Alive is perfectly capable of managing all of these tasks – and so are you.
It's critical that you accept something appropriate to listen on, otherwise how will you tell what's going on? Other than your top-spec monitors and headphones, however, it tin be important to preview mixes on your telephone, tablet or anything with speakers – fifty-fifty those you consider tinny and off-colour. Listening via such devices tin can assist you get a more rounded perspective on how your mix might interpret to consumer products. Mix at different levels too, though don't mix likewise loud unless you're in an acoustically treated space and await the finished mix to be heard at a similar volume.
Master the mix
Resource management is of import. You tin can raise the buffer size to make it play back more than smoothly, admitting in a style that would be too lag-heavy for live use. Live, the priority is responsive playback. Here, our priority is stability over speed. Information technology might be that you lot hit upon an effective compromise setting that y'all never have to modify – we don't frequently change buffer size unless nosotros're taking audio in from a particular piece of synced hardware. Freezing tracks tin can also help only resist the temptation to flatten them and catechumen them to audio permanently. Go on your options open up. In that location are mix engineers who'll have your Live projects so they tin dig correct in and accommodate everything at the clip and device level.
You lot're working on your own tunes here, so the mixing process begins with signing off on your arrangement. Be super-critical about your cloth and ask yourself difficult questions simply, more importantly, have the guts to respond them also. Do you really need everything in your track? Don't keep parts that don't work merely because they took a lot of time and effort to create.
It'south not cheating to use a reference track. Notice a song that's a adept example of the audio you're after, load it into your arrangement and listen to it back and along every bit you mix your ain tune. What do yous like about the mix? What tools did they use? How tin you recreate them?
Check your levels. If any of your tracks are going over -1.0 dB, select all of the tracks at once, grab any one of the mixer faders and pull it down until the red peaks disappear. Doing information technology this mode should preserve the relationship you lot've built between your runway levels. Before using limiters, compressors or automation to even out runway levels such as a vocal, try using a plug-in that will automatically ride the track's volume – encounter Melda Productions' MAutoVolume – and heighten the lower levels while lowering the highs. You tin try this out on every voice runway, whether it'southward singing or speech. It will probable save you lot a lot of editing time.
Hold it together
Real-earth instruments such as drums, bass and guitars volition arguably EQ themselves up to a signal, thanks to their traditionally well-divers roles. Synthesisers, nonetheless, can encompass a lot of footing, from deep lows to shrill highs, and can overwhelm a mix as a result. It's easy to make a monstrous synth-bass preset in isolation but it might ruin the balance of your rail. But Live's native devices are good enough for mixing, and there are people out at that place using them successfully.
Call back: not everything needs reverb. Choose effects because you similar them and because they fit your projection, non considering you're checking off a list. If you're working with long audio takes such every bit vocals or guitars, in that location'due south no need to take warping on at all unless y'all desire them to play at a different tempo from the original recording or there are timing issues you need to set up. Fifty-fifty then, you lot tin carve up the prune and warp just a small section of it. We can't stress enough how grouping tracks tin revolutionise your mixing by letting you break your mix into chunks. Beingness able to apply dynamics plug-ins on groups can have the heat off principal tracks too, and give you more clarity and control.
Some other important give-and-take of advice: take a pause. Whenever you lot're feeling worn down or overworked or feel you lot've reached a expressionless end, pace abroad. Go for a walk. Visit a museum. Practise something else, annihilation, and then come up back fresh. You lot might observe something you missed or, fifty-fifty better, be pleasantly surprised past what y'all've returned to. Don't overmix either. If it doesn't sound like information technology needs a lot of work, perchance it doesn't. Don't mix because you feel you have to. Yous've probably been incrementally mixing throughout your production, and so information technology's possible yous've dealt with potential issues already.
At the stop of the process, you should have a stereo mix that's prepare to be mastered. That's another job Alive can handle merely for now…
Critical mixing communication in Ableton Live 10: step-by-step
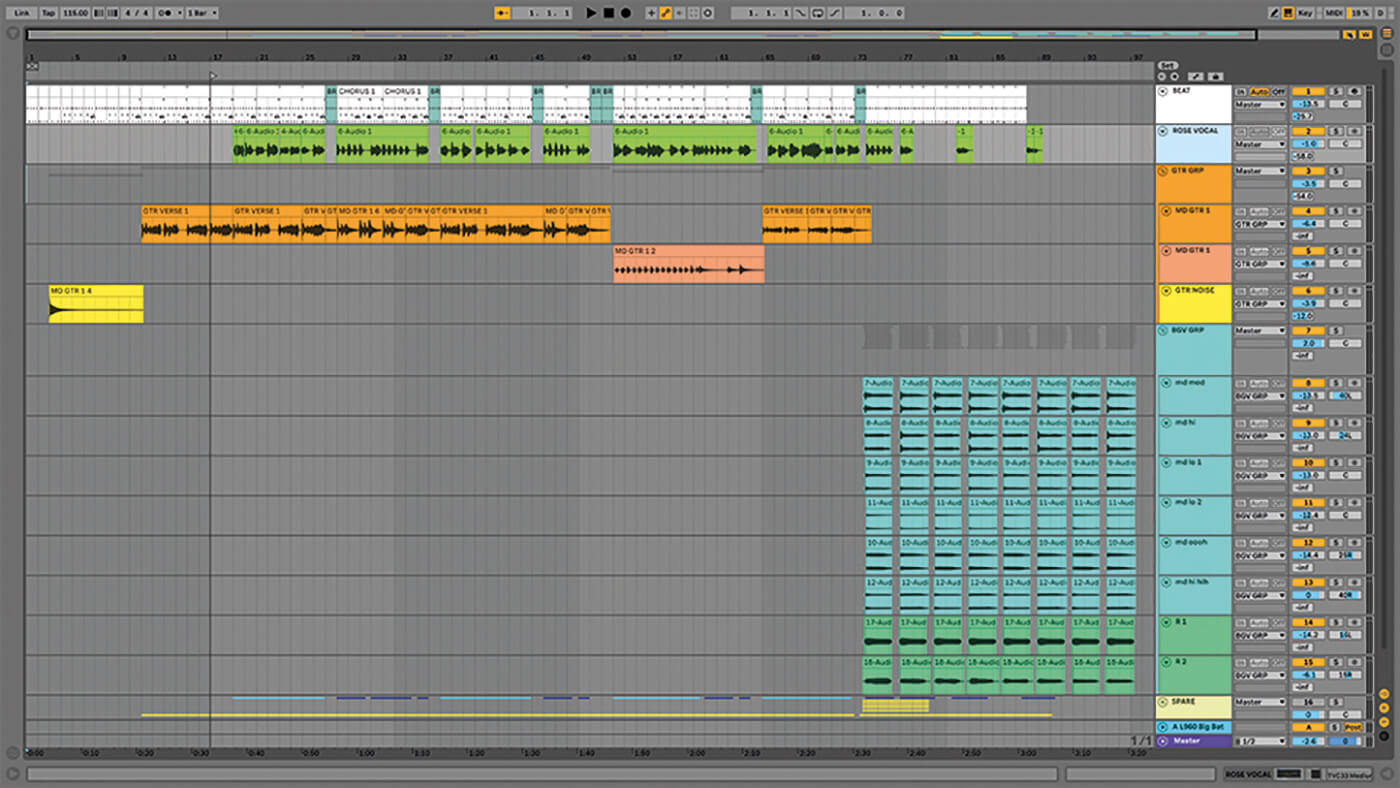
1. You should have done and then already but, in case you haven't, this is the perfect fourth dimension to pause, colour lawmaking and rename the clips and scenes throughout your rails. Create a reliable and logical system that you tin can use in futurity.

2. Use more than than 1 monitoring source. The speakers you lot mix with don't take to be especially large or expensive only they need to be accurate. Speakers are improve for big-moving-picture show mixing, while headphones are more suited for detailed listening. Y'all'll need both.
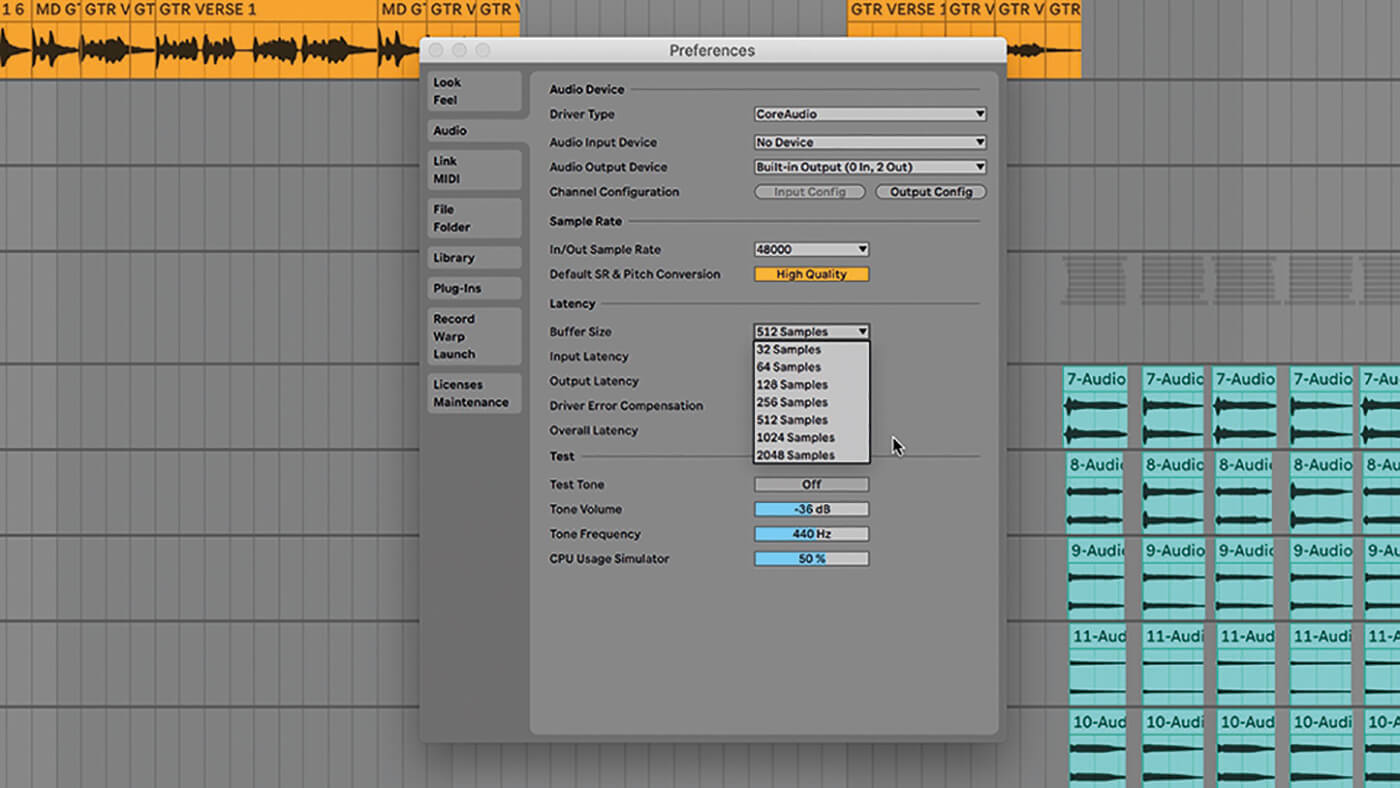
iii. If the arrangement plays back without glitching, fantastic. If not, endeavour changing your buffer size to a higher value. Yous could as well freeze the tracks one by 1 after you've done editing them, which will take the load off your CPU.

4. This is your last chance to get through your MIDI programming. Check your clips for whatever wrong notes, cheque your velocities and, most importantly, check your annotation lengths. Unplanned overlapping notes can sound sloppy, create sonic clutter and prevent other notes from playing.
5. Dig into your audio clips and check the warping. Do you demand warping on at all? If y'all're dealing with not-looping clips or clips that don't demand timing adjustments, probably not. For the residual, brand sure to use the appropriate warp way.
vi. If y'all've got sections with stacked audio tracks such equally backing vocals, be conscious of how to warp them. What might exist endearingly loose with i vocal track tin can turn into a smeary mess when used over ten tracks. Use warping to tighten them up.
![]()
HARD Do good With Live in Organization View, you can still employ Push to control musical instrument and effects, and browse and load samples. It volition display mixer track levels and provide useful visual feedback, controllable via the eight encoders below the display.
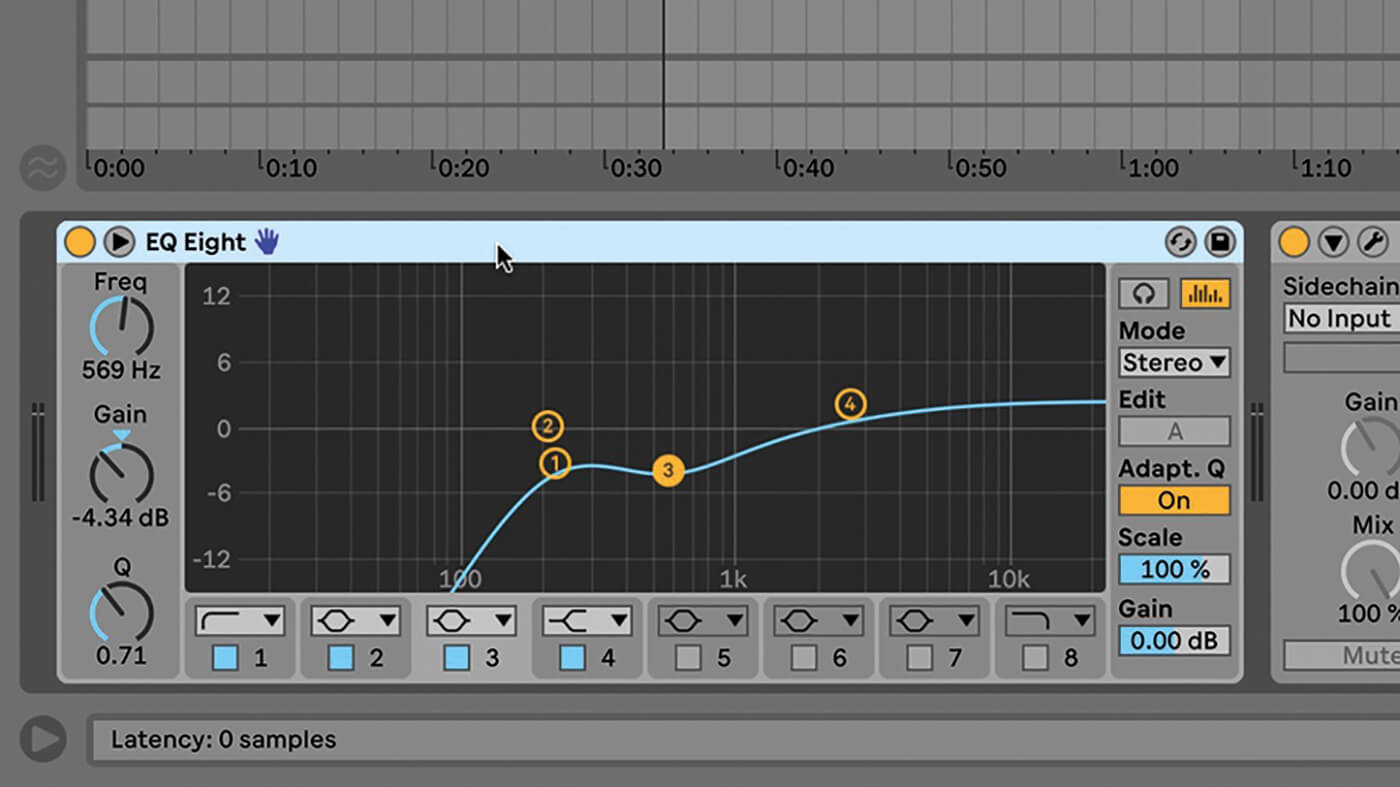
7. EQ is arguably your well-nigh important mixing tool. You might need EQ Eight on every track. It'south a common technique to scroll off the low, low frequencies on audio tracks, because it'due south so like shooting fish in a barrel to pick upwardly depression-end rumble from the room you recorded in.
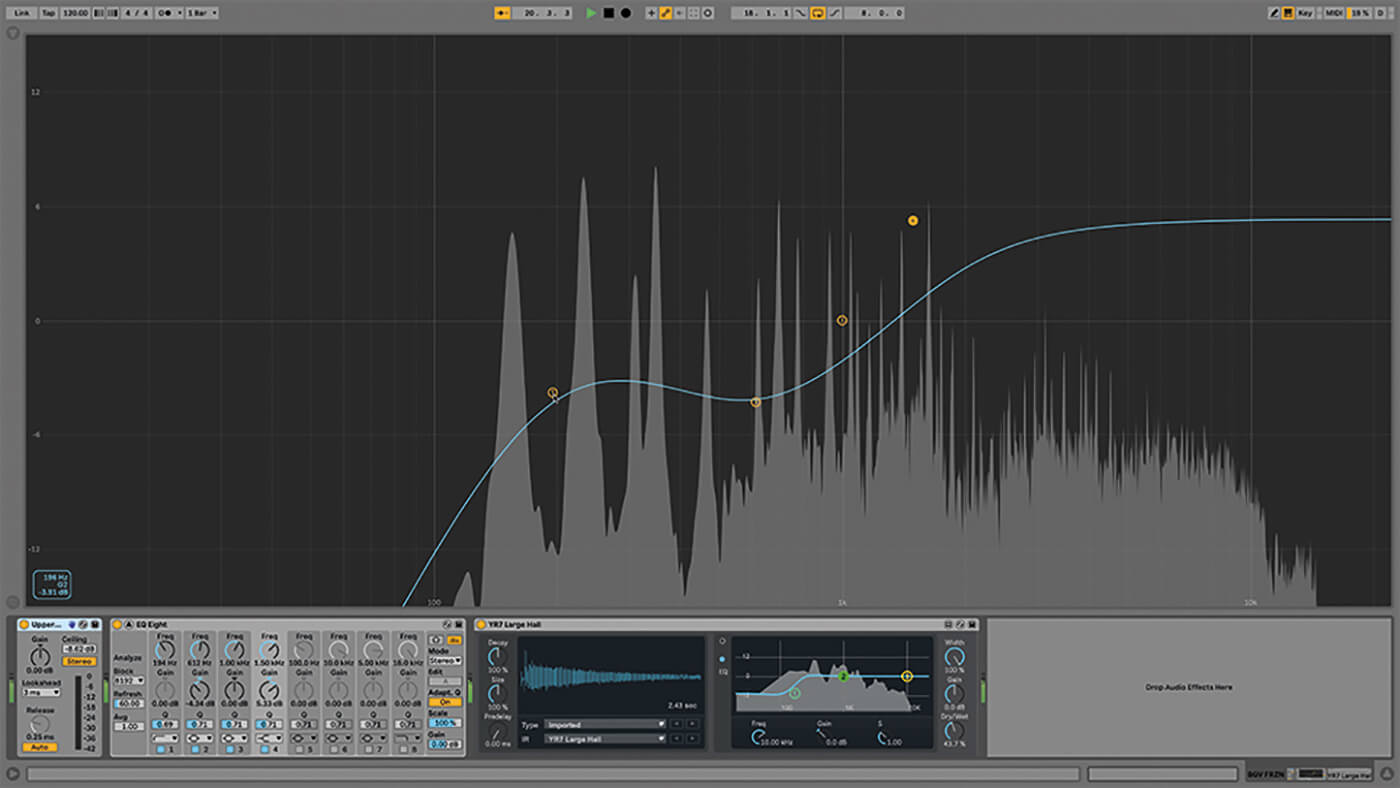
8. EQ tin can assistance tracks find their own infinite in the frequency spectrum. If used to cut where frequencies cross over, this tin articulate up a mix like nothing else. Employ the frequency display in the EQ or the divide Spectrum effect to visualise what's going on.
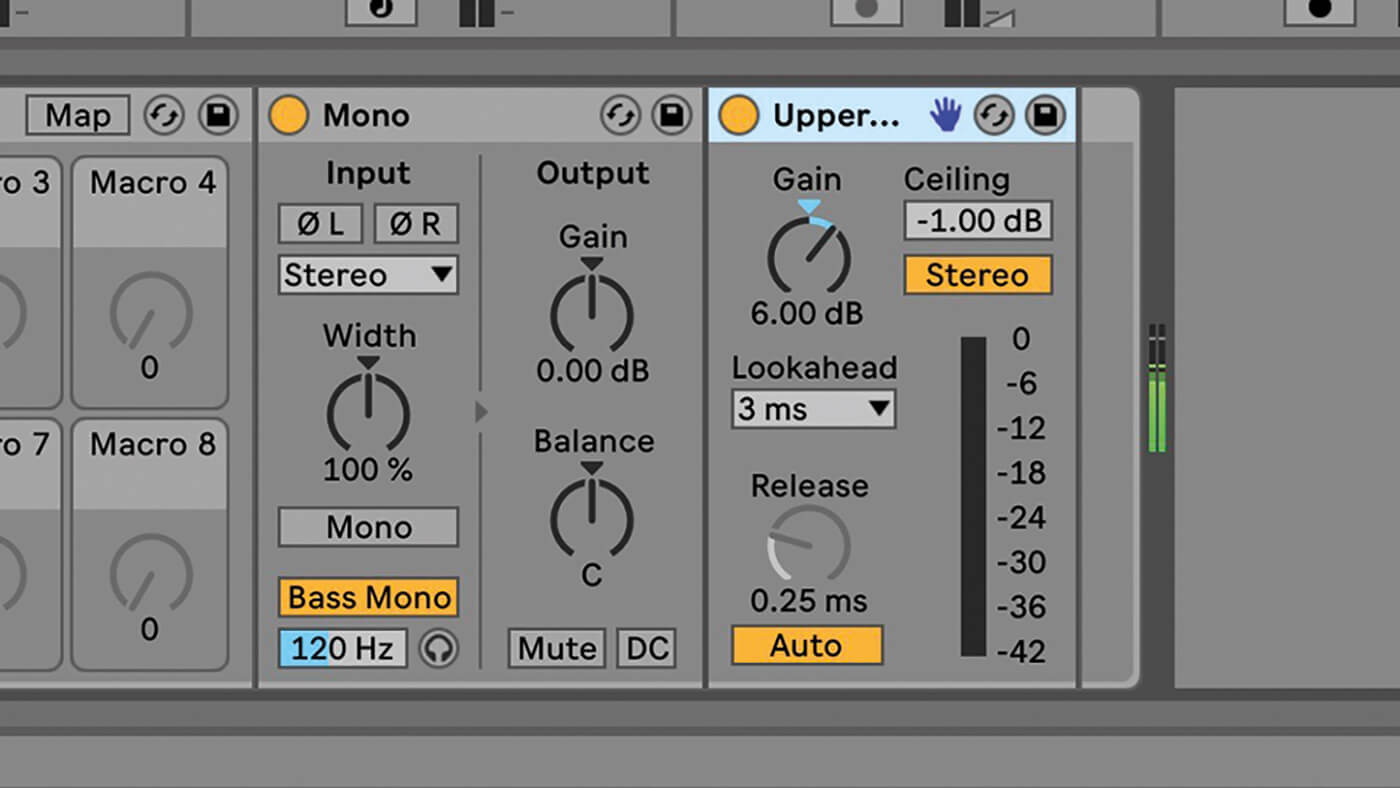
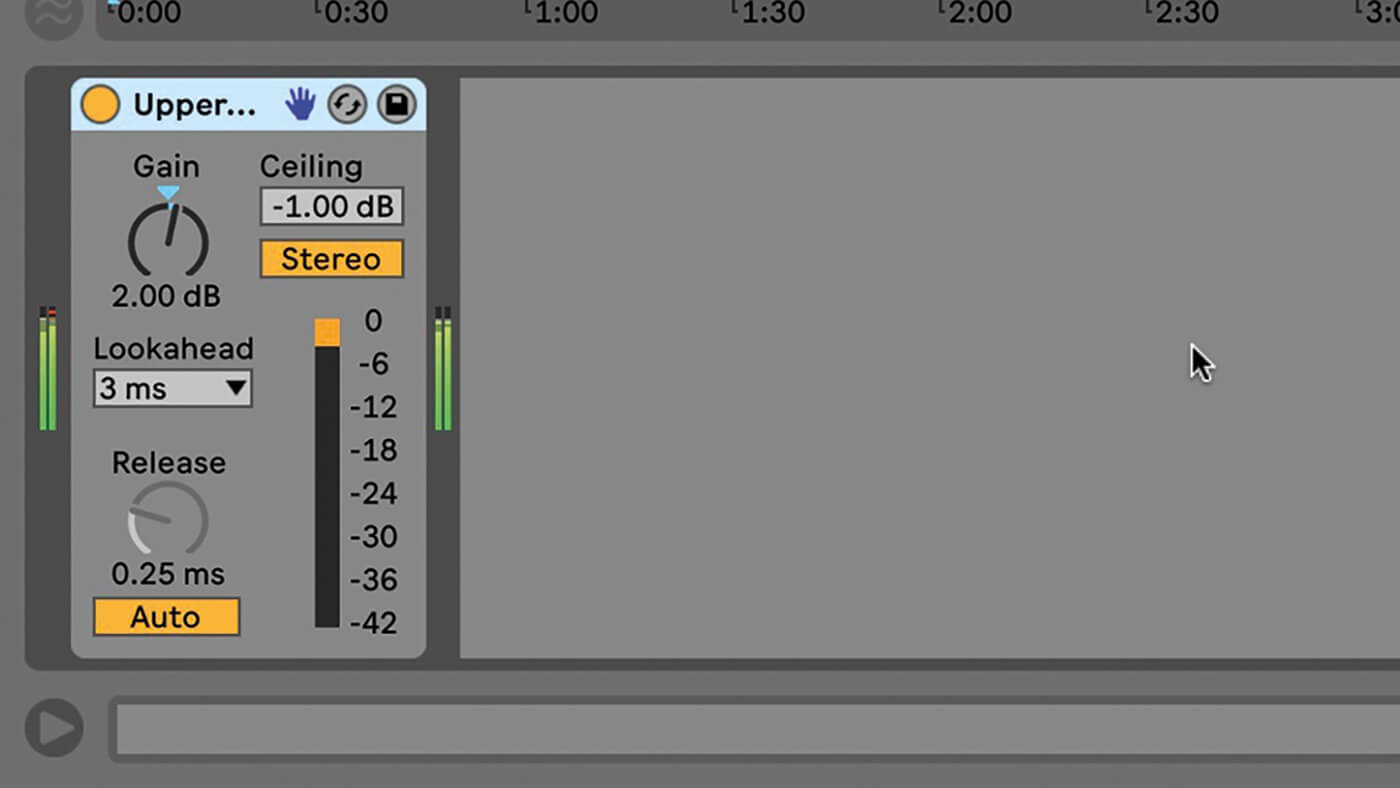
ix. Put a limiter on every track and set them to -1.0 dB. This provides an absolute here-and-no-further level for the track. If the track is too repose, use the limiter's proceeds command to boost the input a bit.
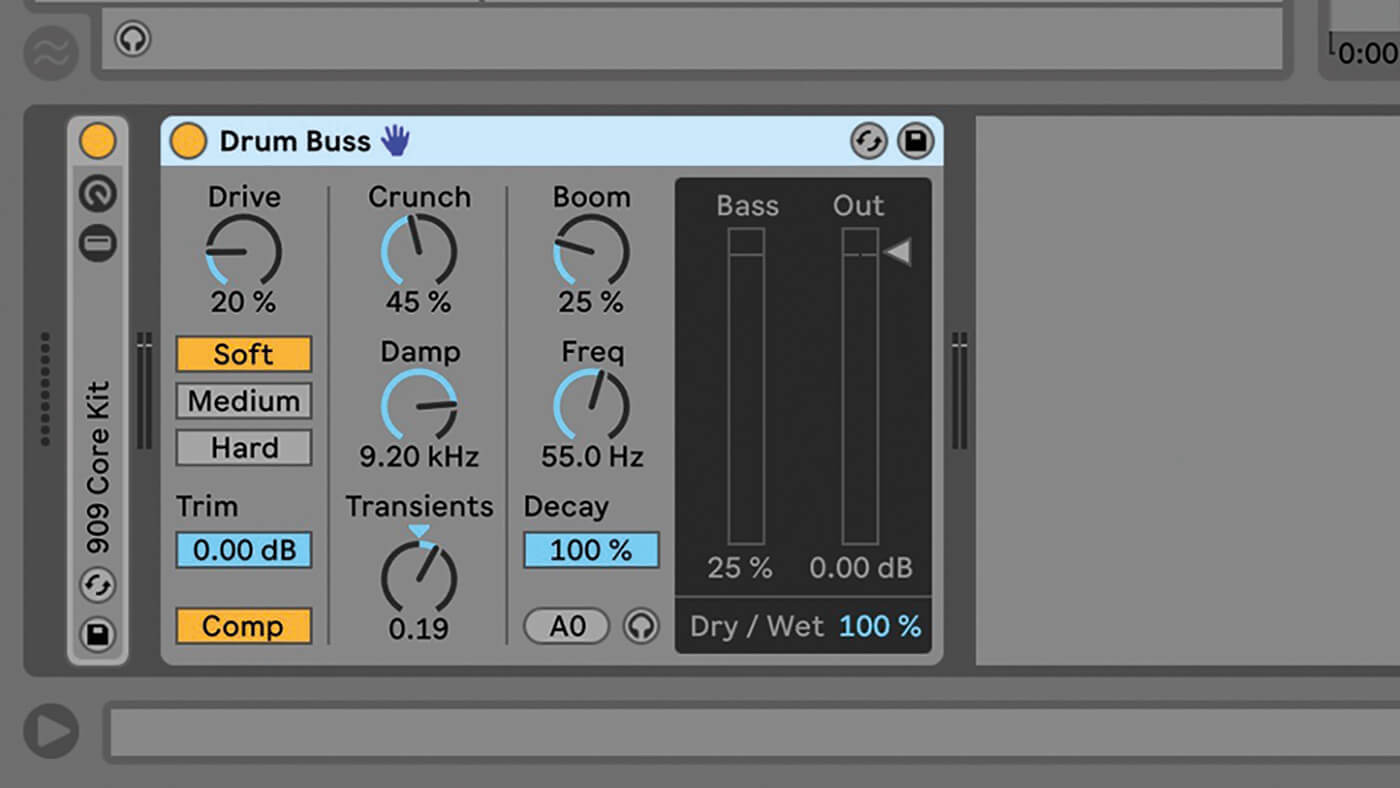
10. Yous can shrink private tracks if you retrieve they demand information technology, though the limiter may be more useful here. Compressors can also exist used equally tonal effects likewise.
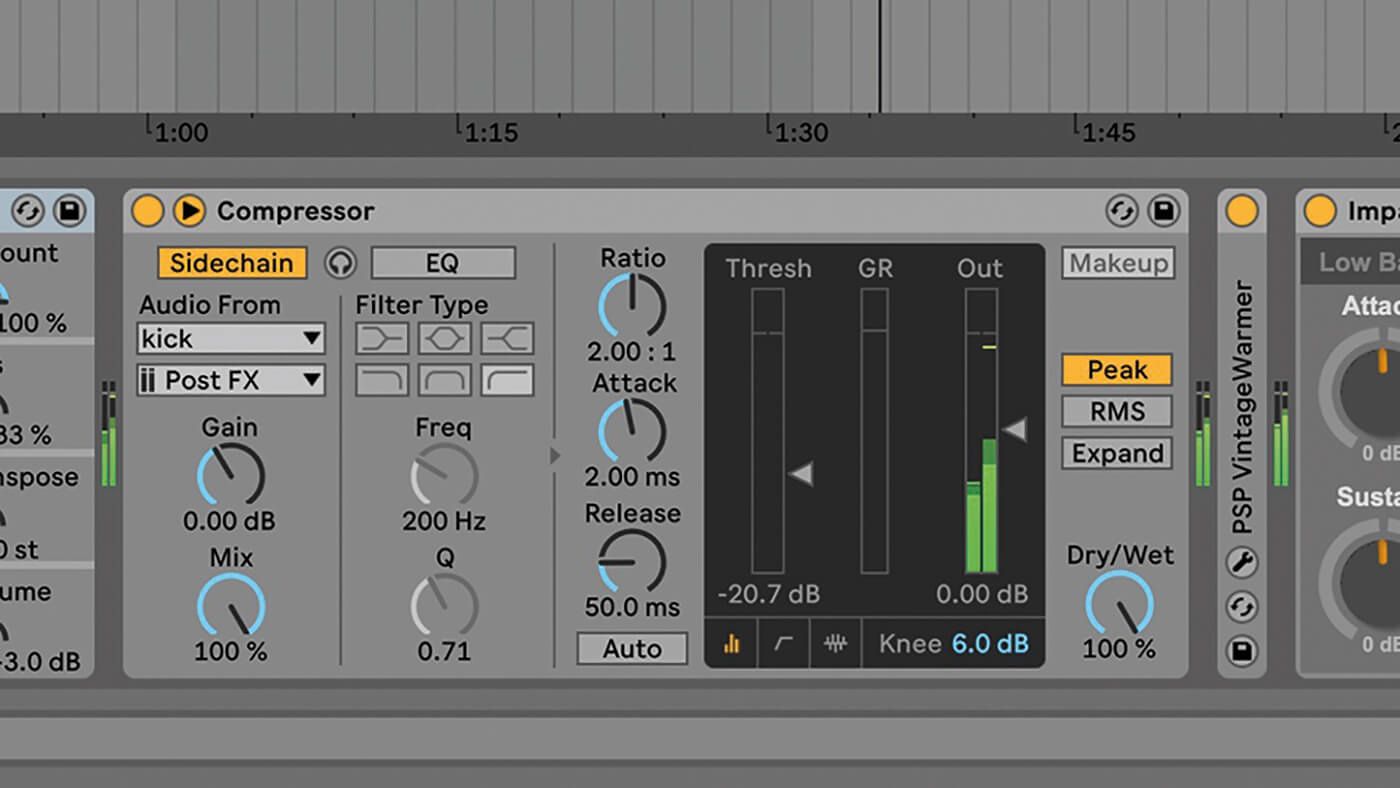
11. Sidechaining is ofttimes used as an audible upshot but it can also assistance individual tracks maintain their presence in a mix, the boot drum being the classic example. Sidechain a bass rail to a kick drum and the kicking will always cut through.
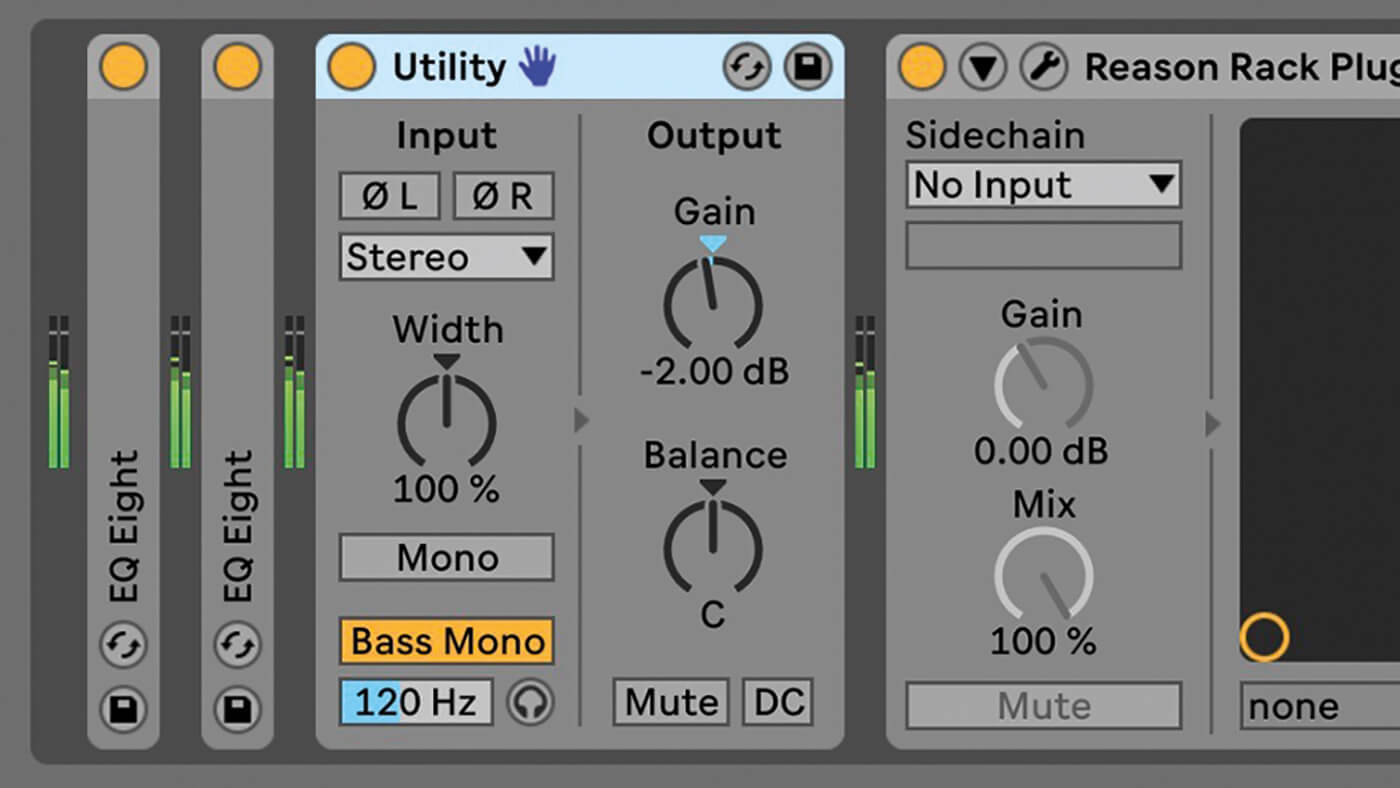
12. The Utility device can be useful on single tracks and entire mixes. Use the Bass Mono switch and set a frequency to keep your depression end tight, and then use the Width control to expand the width of the rest of your output.
![]()
Proceed THINGS TIDY If you've accumulated a vast sea of unused or muted tracks, they need to go. Brand sure that only the elements you're working on are hither in your last track, and that it isn't swamped with surrounding ideas or melodies. Exist tough.
13. All your rails effects are likely to be in place by the mixing stage but take this opportunity to review how they work in the context of your tune. There's no right or wrong here, just be sure they're doing what you desire.

xiv. Return tracks, through which the aforementioned effects selection can be applied beyond all tracks to different degrees via the Send controls, tin can add more uniformity and consistency to your overall mix. There are 12 slots available in the total version of Live.

15. Group tracks can transform a mix. By collecting related tracks –percussion and synths, for instance – you're able to treat them every bit a single entity. This allows y'all to EQ, compress or add effects to an entire group.

16. Some other advantage of using grouping tracks is that you can make quick overall volume adjustments. One time you've got the levels balanced within the groups, it'll effectively reduce your project to but a handful of tracks and make information technology much easier to manage.
17. You lot don't have to slather your master rails with effects. If you've used grouping tracks, you might not need to add much to the master except for another limiter and perhaps a tape simulator or other such colouring effect.
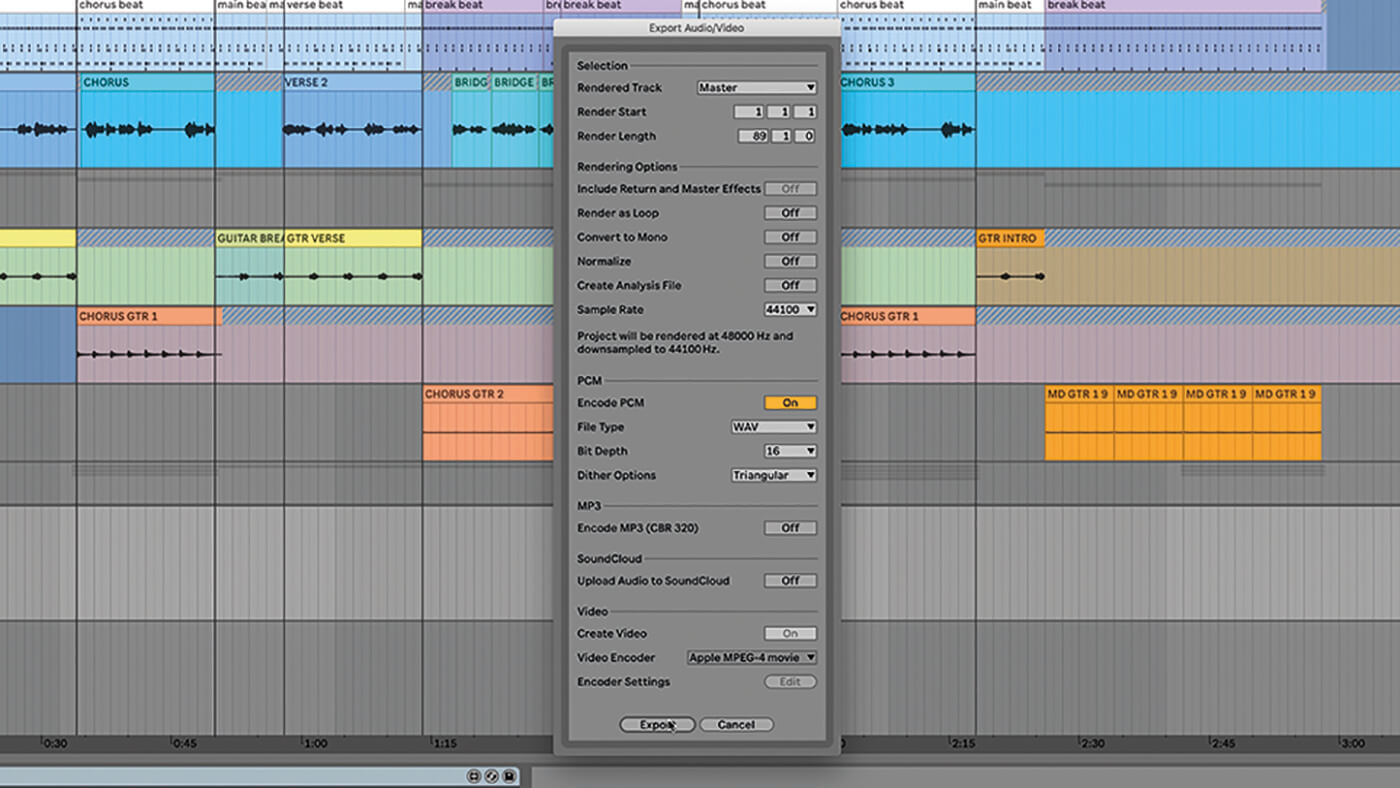
18. The final stage of mixing is to consign a stereo mix. Don't worry most maximising the primary level – stay well under that. Don't use normalisation and avert compressing or limiting the main output. We'll exist dealing with these problems at a afterwards appointment.
For more Alive tutorials and workshops, cheque hither .

Where Should The Name Of The Track Never Be Changed?,
Source: https://musictech.com/tutorials/ableton-live/critical-mixing-advice-in-ableton-live-10/
Posted by: arnoldbutile.blogspot.com
0 Response to "Where Should The Name Of The Track Never Be Changed?"
Post a Comment